Building a Wallet Connector
The @thirdweb-dev/wallets package provides a set of pre-built components and functionality for creating and managing cryptocurrency wallets.
The following will guide you through how you can create your own wallet connector in a few simple steps:
- Implement your own
Connectorclass - Implement your own
AbstractClientWalletclass - Integrate with Connect Wallet button in React/React Native
At the end of this guide, you should have a fully functional wallet that can be used with the thirdweb TS, React and React Native SDKs.
1. Extending the Connector class
The Connector abstract class is the
interface between your wallet core functionality and the actual wallet class you'll use in your application.
This is the biggest part of the wallet implementation and allows to bridge any wallet provider to a standardized interface.
Interface
export class MyConnector extends Connector {
  connect(args?: ConnectParams<TConnectParams>): Promise<string>
  disconnect(): Promise<void>
  getAddress(): Promise<string>
  getSigner(): Promise<Signer>
  getProvider(): Promise<providers.Provider>
  switchChain(chainId: number): Promise<void>
  isConnected(): Promise<boolean>
  setupListeners(): Promise<void>
  updateChains(chains: Chain[]): void
}
You can choose to implement all or part of the connector functionality.
Required methods
connect
This method should trigger the connection flow of your wallet with the user's app.
Configuration
args
The arguments needed to connect your wallet. This is specific to your wallet implementation which is why we leave it open for you to add custom arguments here.
Returns a string containing the wallet address, or undefined if the connection failed.
abstract connect(args?: ConnectParams<TConnectParams>): Promise<string>;

ConnectParams<TOpts extends Record<string, any> = {}> = {
  chainId?: number;
} & TOpts;
getSigner
Returns a Promise<Signer> with the ethers signer associated with your wallet.
getProvider
Returns a Promise<providers.Provider> with the ethers provider associated with your wallet.
disconnect
Disconnect the currently connected wallet from your app.
isConnected
Returns a Promise<boolean> indicating whether the wallet is connected or not.
getAddress
Returns a Promise<string> with the currently connected wallet address.
Optional methods
You can throw an exception or leave the implementation empty if you don't want to implement these methods.
switchChain
Switch the chain the wallet is connected to.
setupListeners
This method should set all listeners needed for the wallet to work. It will be used by the AbstractClientWallet class to set up the listeners
when the wallet is connected.
updateChains
Update the chains the wallet can connect to.
Configuration
chains
The chains that are supported by the wallet. Defaults to our default chains.
Must be an array of Chain objects.
type Chain = {
  chainId: number;
  chainName: string;
  nativeCurrency: {
    name: string;
    symbol: string;
    decimals: number;
  };
  rpcUrls: string[];
  blockExplorerUrls: string[];
};
2. Extending the AbstractClientWallet class
Now that the hard part is done, the rest is easy, we just need to wrap our connector in a AbstractClientWallet class.
The AbstractClientWallet class is the base
class that provides an interface for interacting with your connector on one side and with applications on the other.
The main method that needs to be overridden is the getConnector method. This method should return a Promise
that resolves to the Connector
class that you implemented.
export class MyWallet extends AbstractClientWallet {
  async getConnector(): Promise<Connector> {
    return new MyConnector();
  }
}
You can expose any custom logic here as the public API for your wallet.
Required Methods
getConnector
Returns a Promise<Connector> with the connector class that you implemented.
Using your new wallet
At this point, you should be able to instantiate your new wallet and call connect on it.
const wallet = new MyWallet();
wallet.connect();
Examples
You can look at how the built-in wallets in @thirdweb-dev/wallets package are created for reference
3. Integrate with Connect Wallet button
Create a wallet configurator function
The last step is to integrate it with the ConnectWallet by creating a wallet configurator - a function that returns a WalletConfig object and adding it in ThirdwebProvider's supportedWallets
import { WalletConfig } from '@thirdweb-dev/react'

function myWallet (options?: MyWalletConfig): WalletConfig<MyWallet> {
  return {
    id: 'my-wallet',
    meta: {
      name: "My Wallet",
      iconURL: "https://...", // or ipfs://...

      // optional
      urls: {
        chrome: "https://...",
        firefox: "https://...",
        android: "https://...",
        ios: "https://...",
      },
    },

    // create and return wallet instance
    create(walletOptions) {
      return new MyWallet({ ...walletOptions, ...options })
    }

    // optional - render a UI for connecting your wallet
    connectUI(props) {
      return <MyWalletConnectionUI {...props} />;
    },

    // optional - override the default UI for selecting your wallet in the wallet selector screen
    selectUI(props) {
      return <MyWalletSelectionUI {...props} />
    }

    // optional
    isInstalled() {
      // detect if your wallet extension is installed on the user's browser/device
      return true; // or false
    },

    // optional - show a "recommended" badge below your wallet's name in the wallet selector screen
    recommended: true,
  };
};
Required
id
A unique ID for your wallet. It is used to identify your wallet among other wallets in the app.
It can be anything, but using the name of your wallet as id is recommended because it
is not likely to be used by other wallets.
meta
metadata of your wallet.
name and iconURL are required. They are used to display your wallet in the list of supported wallets in Connect Wallet Modal's Wallet Selector screen.
urls object is optional and all of its properties are optional as well.
{
  chrome?: string;
  firefox?: string;
  android?: string;
  ios?: string;
}
create
A function that creates and returns the wallet instance.
Type
import type { WalletOptions } from "@thirdweb-dev/wallets";
import type { WalletInstance } from "@thirdweb-dev/react";

type Create = (walletOptions: WalletOptions) => WalletInstance;
You can create an instance of your wallet using the walletOptions provided by the create function and optionally add the options provided by the myWallet function.
create(walletOptions) {
  return new MyWallet({
    ...walletOptions,
    ...options,
  });
}
since the create method only provides options of type WalletOptions - the rest of the wallet-specific configuration (if any) can be exposed as options of the myWallet function.
Optional
connectUI
connect(connectUIProps: ConnectUIProps) => React.ReactNode;
A function that returns a React component that renders the UI for connecting your wallet.
This UI will be rendered inside the ConnectWallet Modal when the user clicks on your wallet in the wallet-selector screen.
The connectUI function provides the props of type ConnectUIProps which you can use in your UI to trigger various actions - like closing the modal, opening the modal, connecting the wallet, going back to the list of supported wallets etc.
type ConnectUIProps = {
  walletConfig: WalletConfig;
  supportedWallets: WalletConfig[];
  open: () => void;
  close: (reset?: boolean) => void;
  isOpen: boolean;
  goBack: () => void;
  theme: "dark" | "light";
  selectionData: any;
  setSelectionData: (selectiondata: any) => void;
};
walletConfig
walletConfig: WalletConfig;
WalletConfig object of your wallet. You can use it for connecting your wallet and getting metadata
supportedWallets
supportedWallets: WalletConfig[];
List of all supported wallets including your wallet.
You can use this to conditionally render UI based on how many wallets are supported.
If only one wallet (your wallet) is supported, ConnectWallet Modal will skip showing the wallet selection screen and directly render the connectUI of your wallet.
You can detect this by checking if supportedWallets.length === 1 and adjusting your UI accordingly - for example: not rendering a "back" button
open
open: () => void;
Open the ConnectWallet modal
close
close: (reset?: boolean) => void;
close the ConnectWallet modal.
If close is called with true ( reset = true ), the ConnectWallet modal will be reset to its initial state - so that if it's opened again, it will start from the wallet-selection screen. By default reset is true
isOpen
isOpen: boolean;
Indicates whether the ConnectWallet modal is open or not
goBack
goBack: () => void;
Go back to the wallet selector screen in ConnectWallet modal
theme
The theme of the ConnectWallet modal. You can use this to render your connect UI to match the theme of the modal
selectionData
selectionData: any;
selectionData passed from selectUI's onSelect function.
This is only relevant if you are using selectUI to render a custom UI for selecting your wallet
setSelectionData
setSelectionData: (selectiondata: any) => void;
set selectionData.
This is only relevant if you are creating a connectUI which involves rendering other wallets and you need to render the selectUI of those wallets and need to pass down the onSelect prop.
Headless Mode
If no connectUI is given, the wallet is assumed to be in "headless" mode - meaning that it does not require any UI to be rendered inside the ConnectWallet Modal to connect the wallet - This can be the case if either the wallet has its own UI that is appended to DOM (Example: walletConnect on web) or it does not require any UI at all.
In this case, when the user clicks on your wallet in the wallet selector screen, your wallet is connected using the useConnect hook and the ConnectWallet Modal is closed.
selectUI
selectUI(selectUIProps: SelectUIProps) => React.ReactNode;
A function that returns a React component that renders the UI for selecting your wallet.
Instead of the default icon + name in wallet selector screen, you can render a custom UI for your wallet.
Take Embedded wallet for example, It renders an Social Icons + Email Input.
In this example, rest of the wallets are put behind a "Connect a wallet" button - that is NOT because the embeddedWallet wallet has a custom selectUI but because the embeddedWallet is a social login.
If you add a custom selectUI to your wallet, This will not be the case and rest of the wallets will be rendered in the same screen below your wallet's selectUI
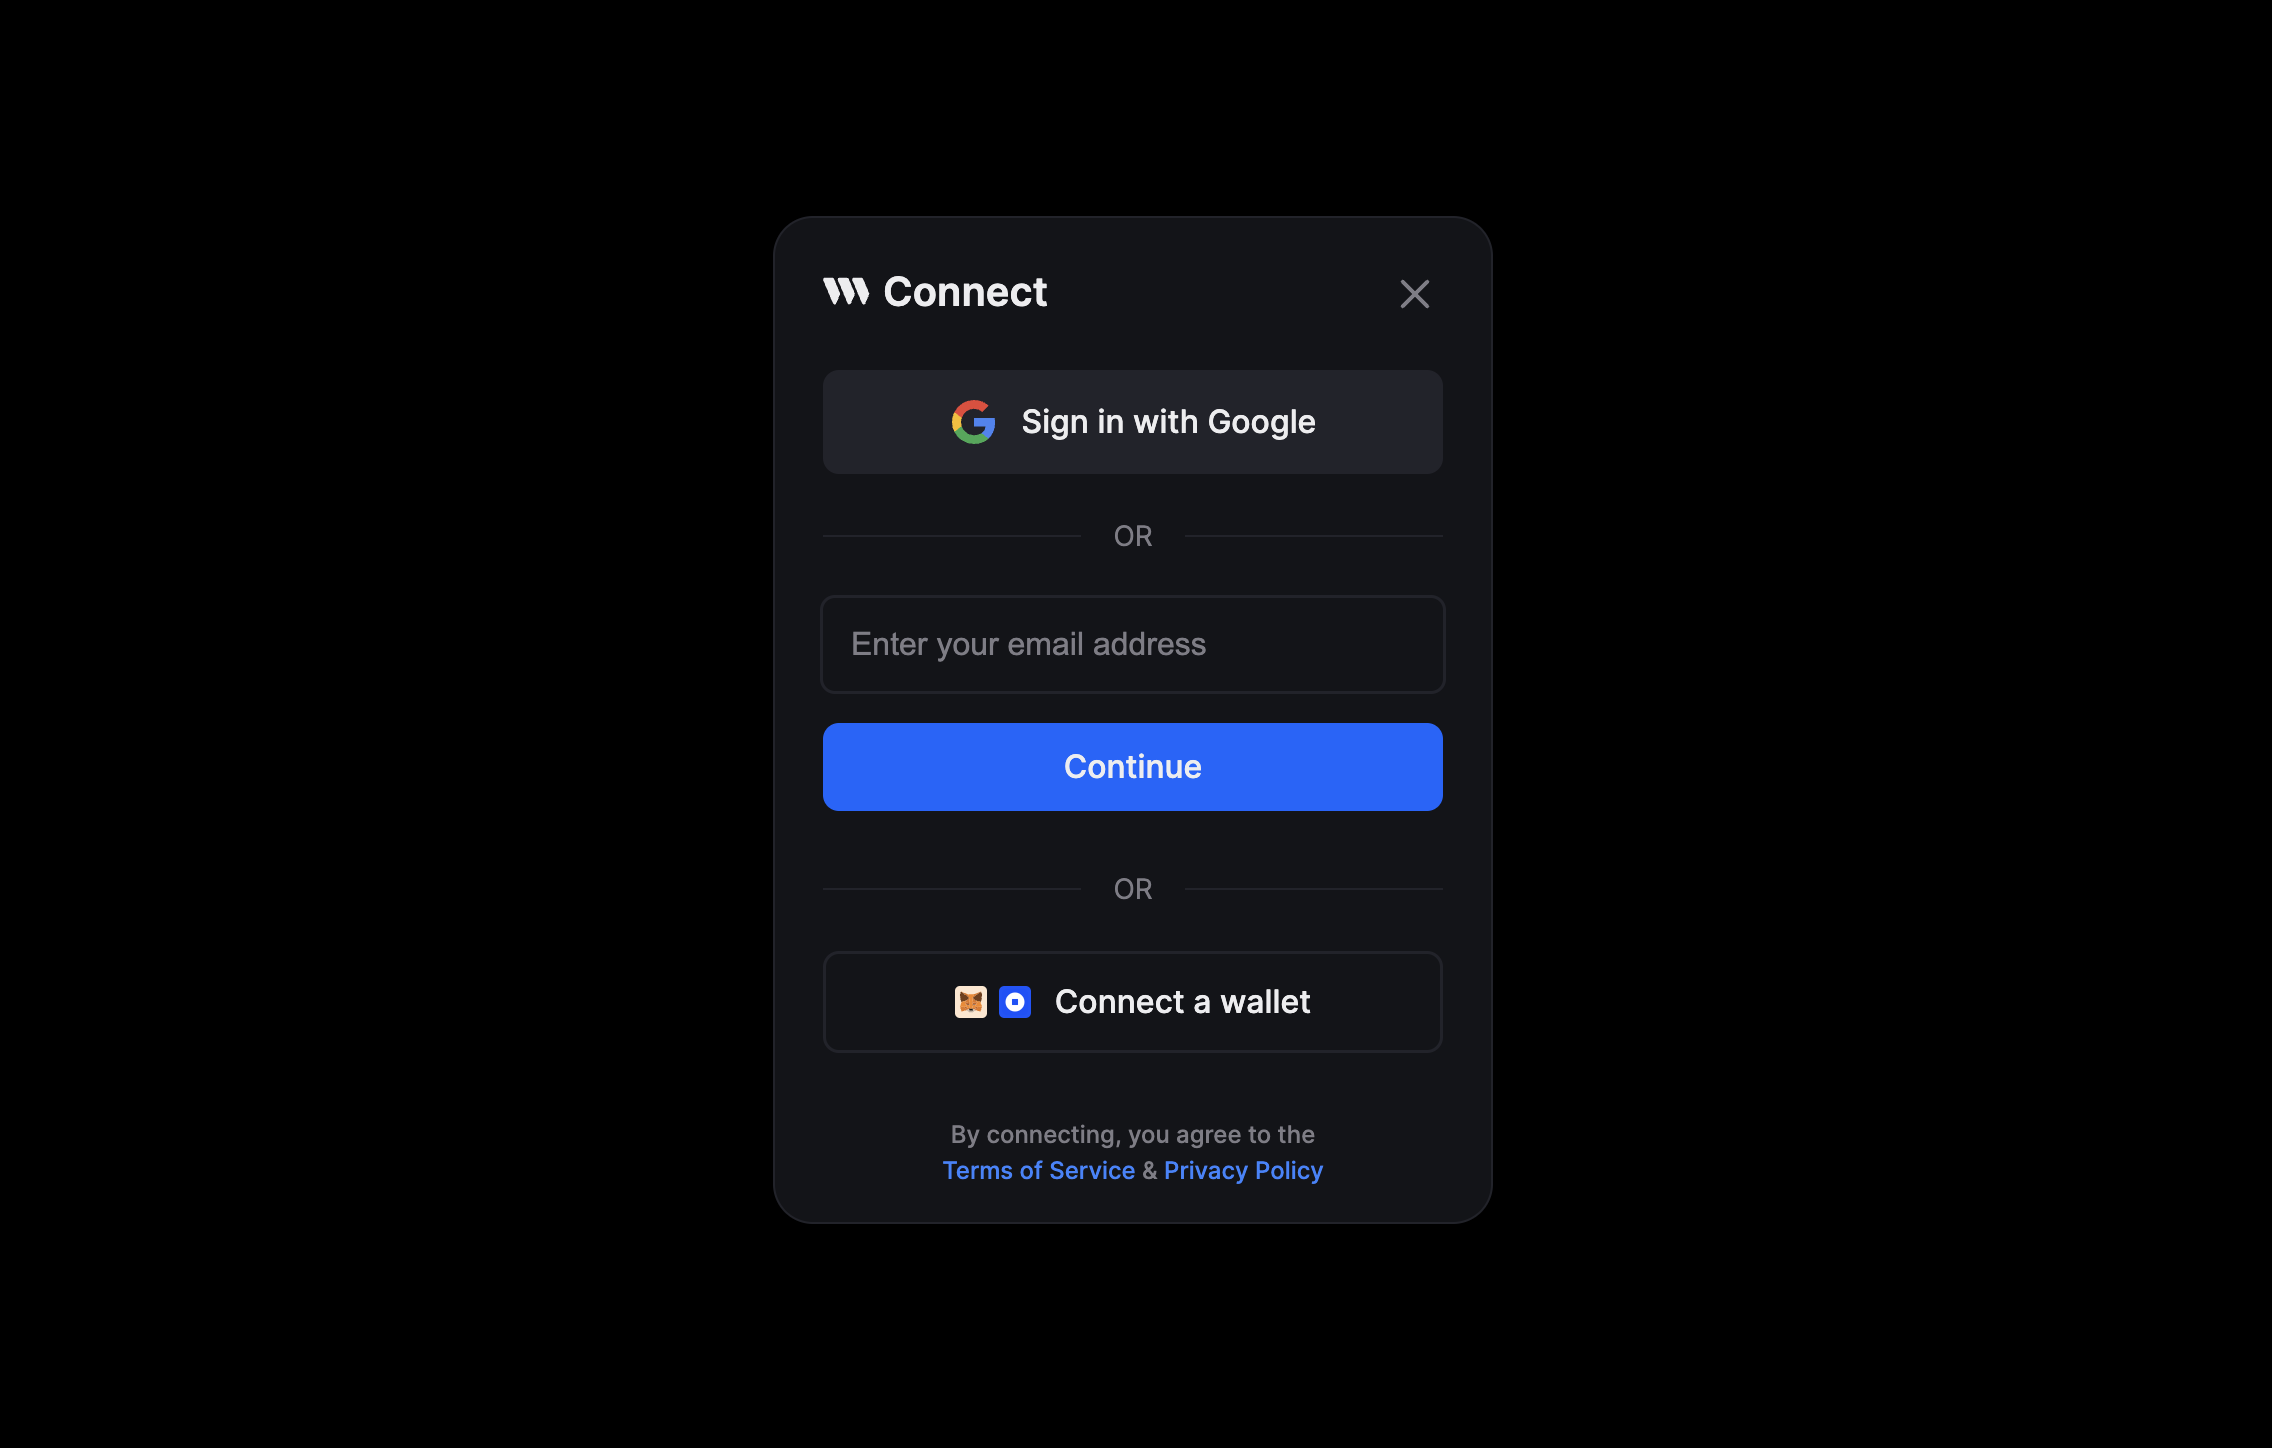
Wallets with selectUI are rendered at the top of the list in ConnectWallet Modal's wallet selector screen.
The selectUI function provides the props of type SelectUIProps which you can use in your UI to trigger wallet selection and move to the next screen in ConnectWallet Modal using onSelect and also optionally save user's input using onSelect(data) which will be passed to connectUI's selectionData prop.
type SelectUIProps = {
  onSelect: (selectionData: any) => void;
  walletConfig: WalletConfig;
  supportedWallets: WalletConfig[];
};
onSelect
onSelect: (selectionData: any) => void;
Call this function to "select" your wallet and render the screen for connecting the wallet. You can optionally pass selectionData to be passed to connectUI's selectionData prop
theme
theme: "dark" | "light";
The theme of the ConnectWallet modal. You can use this to render your select UI to match the theme of the ConnectWallet modal
walletConfig
walletConfig: WalletConfig;
WalletConfig object of your wallet. You can use this to get metadata of your wallet by doing walletConfig.meta
supportedWallets
supportedWallets: WalletConfig[];
List of all supported wallets including your wallet.
You can use this to conditionally render UI based on how many wallets are supported.
For example, You can render an "OR" at the bottom of your UI if more than one wallet is supported
isInstalled
A function that returns a boolean indicating whether your wallet is installed on the user's browser/device or not.
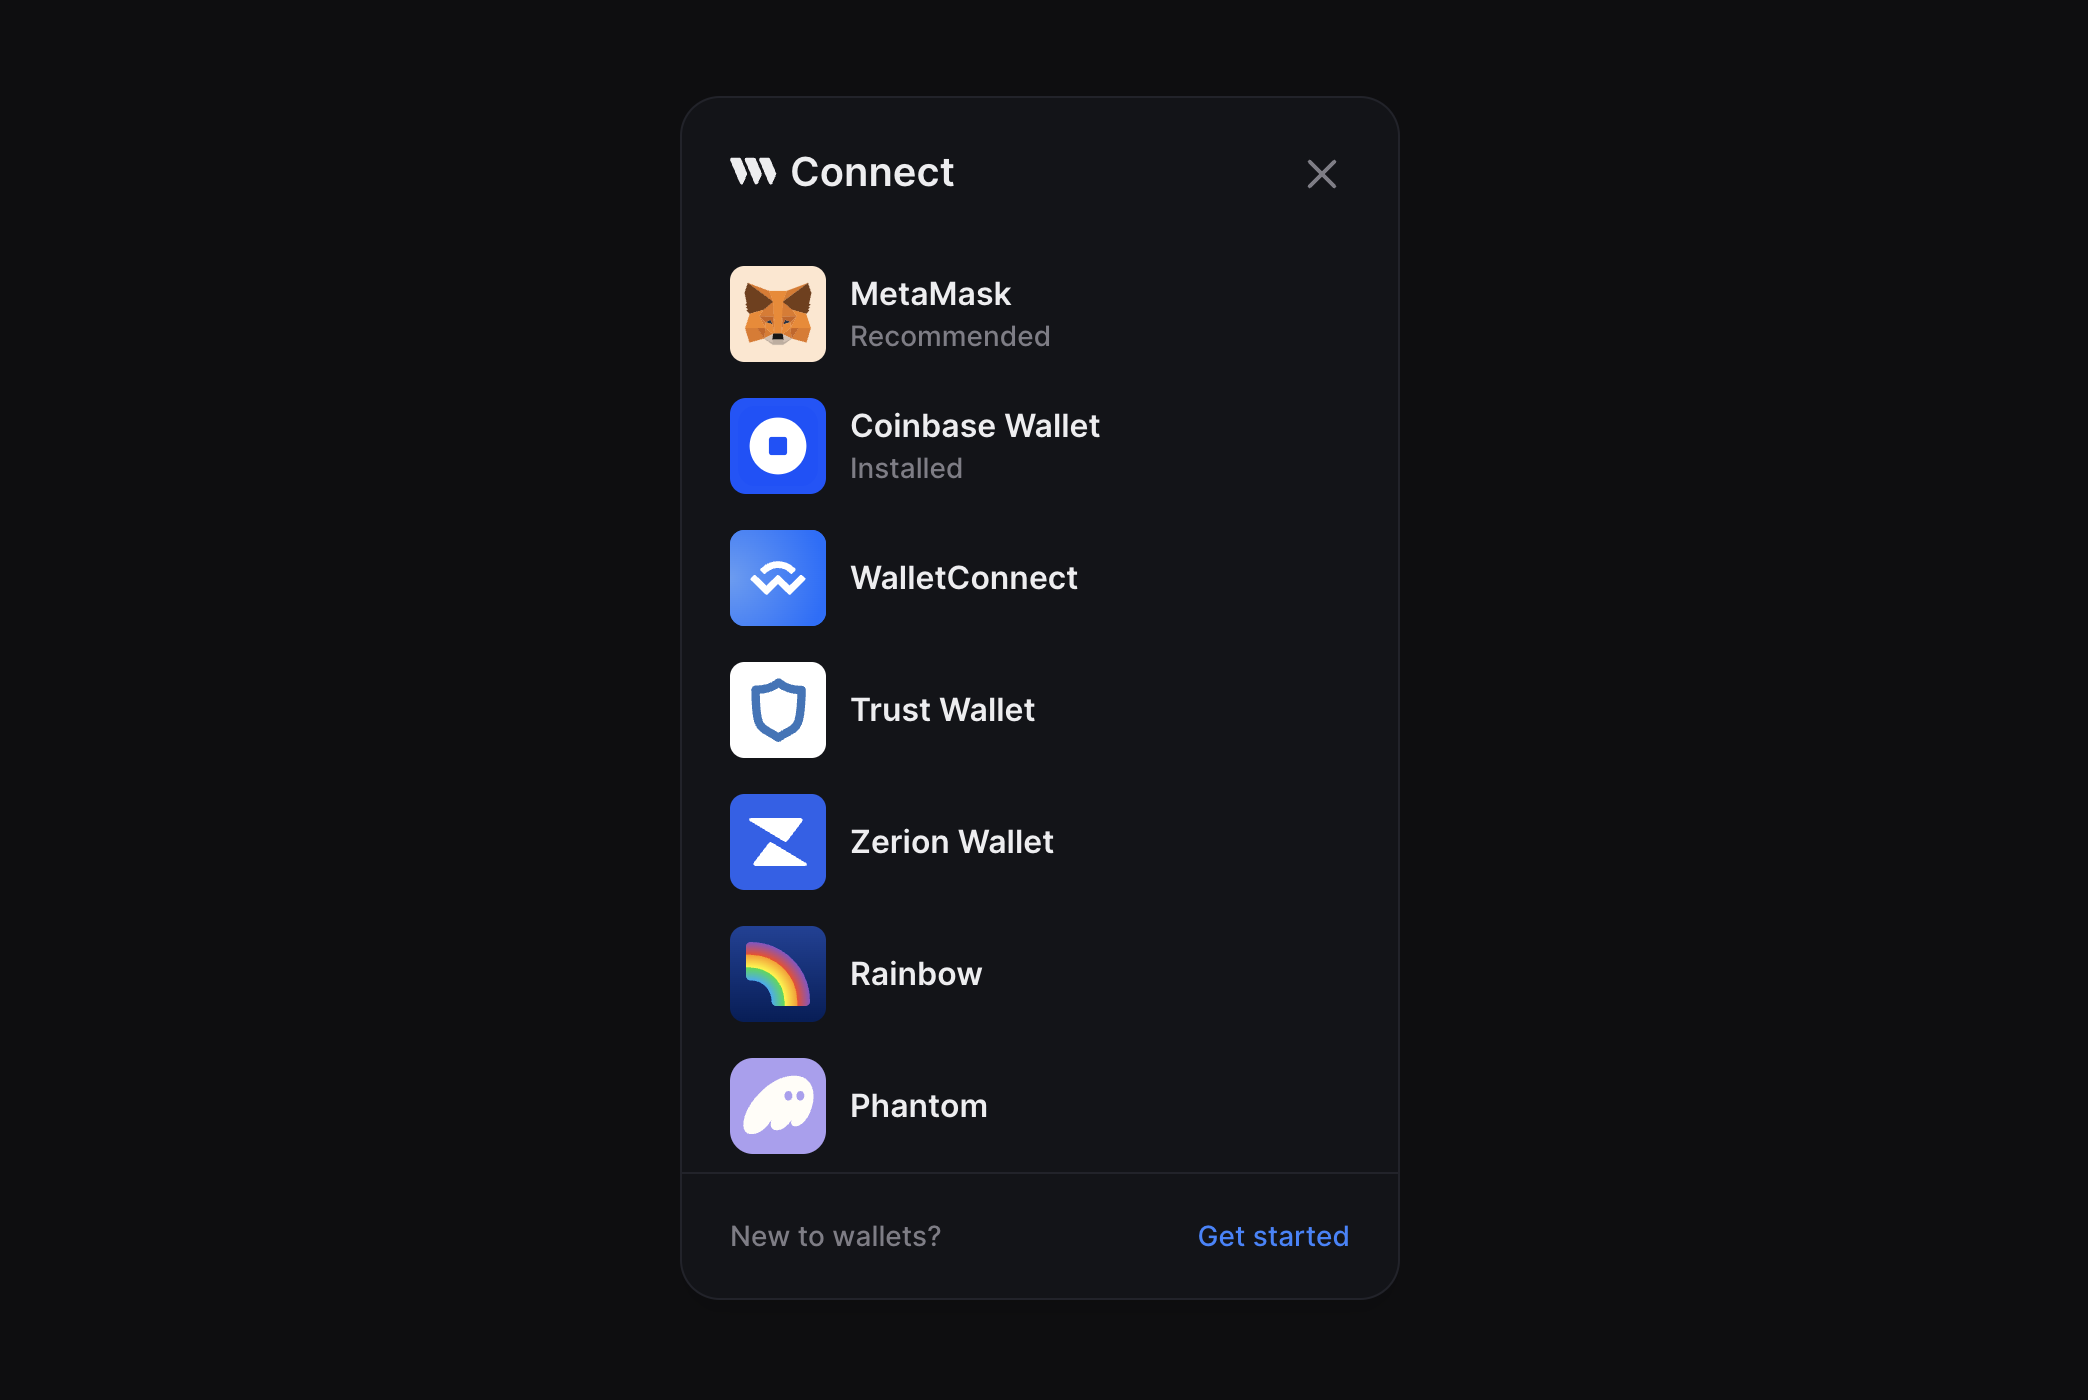
It is used to show an "installed" badge below the wallet's name in ConnectWallet Modal if this function is defined and returns true.
See Coinbase wallet in below screenshot for example:
recommended
Set it to true if the wallet should have the "recommended" badge shown below its name in ConnectWallet Modal.
See MetaMask wallet in below screenshot for example:
Creating wallet connection UI
import { ConnectUIProps } from '@thirdweb-dev/react';

function MyWalletConnectionUI(props: ConnectUIProps<MyWallet>) {
  return <div> ... </div>
}

function myWallet (options?: MyWalletConfig): WalletConfig<MyWallet> {
  // ...
  connectUI(props) {
    return <MyWalletConnectionUI {...props} />;
  }
}
Connecting your wallet in wallet connection UI
There are two ways to connect your wallet in connectUI
Using useConnect hook - Recommended
The recommended way to connect your wallet is to use the useConnect hook.
import { ConnectUIProps } from "@thirdweb-dev/react";

function MyWalletConnectionUI(props: ConnectUIProps<MyWallet>) {
  const connect = useConnect();

  // call this function to connect your wallet
  const handleConnect = async () => {
    try {
      await connect(
        props.walletConfig,
        connectOptions, // if your MyWallet.connect method accepts any options, specify it here
      );

      // close the modal after connecting your wallet
      props.close();
    } catch (e) {
      console.error("failed to connect", e);
      // show error UI or close modal using props.close();
    }
  };

  return <div> ... </div>;
}
Manually creating wallet instance and connecting
You should only use this method if you need access to the wallet instance before connecting your wallet. Otherwise, use the useConnect hook.
There are 3 steps to connect your wallet manually:
- create an instance of your wallet using useCreateWalletInstance
- connect your wallet using the
connectmethod of your wallet - once the wallet is connected, set the wallet instance as connected using useSetConnectedWallet
Make sure to update the connectionStatus using useSetConnectionStatus to "connecting" before connecting your wallet and "disconnected" if the connection fails.
import {
  ConnectUIProps,
  useCreateWalletInstance,
  useSetConnectionStatus,
  useSetConnectedWallet,
} from "@thirdweb-dev/react";

function MyWalletConnectionUI(props: ConnectUIProps<MyWallet>) {
  const createWalletInstance = useCreateWalletInstance();
  const setConnectionStatus = useSetConnectionStatus();
  const setConnectedWallet = useSetConnectedWallet();

  // Call this function to connect your wallet
  const handleConnect = async () => {
    // 1. create instance
    const walletInstance = createWalletInstance(props.walletConfig);
    setConnectionStatus("connecting");

    try {
      // 2. Call `connect` method of your wallet
      await walletInstance.connect(
        connectOptions, // if your MyWallet.connect method accepts any options, specify it here
      );

      // 3. Set connected wallet
      setConnectedWallet(walletInstance);
      props.close();
    } catch (e) {
      setConnectionStatus("disconnected");
      console.error("failed to connect", e);
      // show error UI or close modal using props.close()
    }
  };

  return <div> ... </div>;
}
Rendering a custom UI for selecting your wallet
Instead of the default icon + name in the wallet selector screen, you can render a custom UI for your wallet.
Take Embedded wallet for example, It renders Social Icons + Email Input.
In this example, rest of the wallets are put behind a "Connect a wallet" button - that is NOT because the embeddedWallet wallet has a custom selectUI but because the embeddedWallet is a social login.
If you add a custom selectUI to your wallet, This will not be the case and rest of the wallets will be rendered in the same screen below your wallet's selectUI
This can be done by specifying a React component in the selectUI property of your wallet config.
import { SelectUIProps, ConnectionUIProps, WalletConfig } from '@thirdweb-dev/react';

// example: render an input field where the user can enter their email address
function MyWalletSelectionUI(props: SelectUIProps<MyWallet>) {
  const [email, setEmail] = useState('');
  const usesMoreWallets = props.supportedWallets.length > 1;

  return (
    <div>
      <input value={email} onChange={e => setEmail(e.target.value)} />
      <button
        onClick={() => {
          props.onSelect(email);
        }}
      >
        submit
      </button>
      {usesMoreWallets && <p> --- OR --- </p>}
    </div>
  );
}

function MyWalletConnectionUI(props: SelectUIProps<MyWallet>) {
  // Get the email address entered by the user in MyWalletSelectionUI
  const email = props.selectionData as string;

  return <div> ... </div>;
}

function myWallet (options?: MyWalletConfig): WalletConfig<MyWallet> {
  // ...
  selectUI(props) {
    return <MyWalletSelectionUI {...props} />;
  },
  connectUI(props) {
    return <MyWalletConnectionUI {...props} />
  }
}
Add your wallet to ThirdwebProvider
You can now use your wallet with the Connect Wallet button! Simply add it to the supportedWallets prop of the ThirdwebProvider.
<ThirdwebProvider supportedWallets={[myWallet()]} clientId="your-client-id">
  <App />
</ThirdwebProvider>
Examples
You can look at how thirdweb-dev/react package's built-in wallets are implemented for reference:
Contributing to the Wallets package
If you think your wallet implementation would be useful to others, please consider sharing it by opening a PR to the @thirdweb-dev/wallets package.